
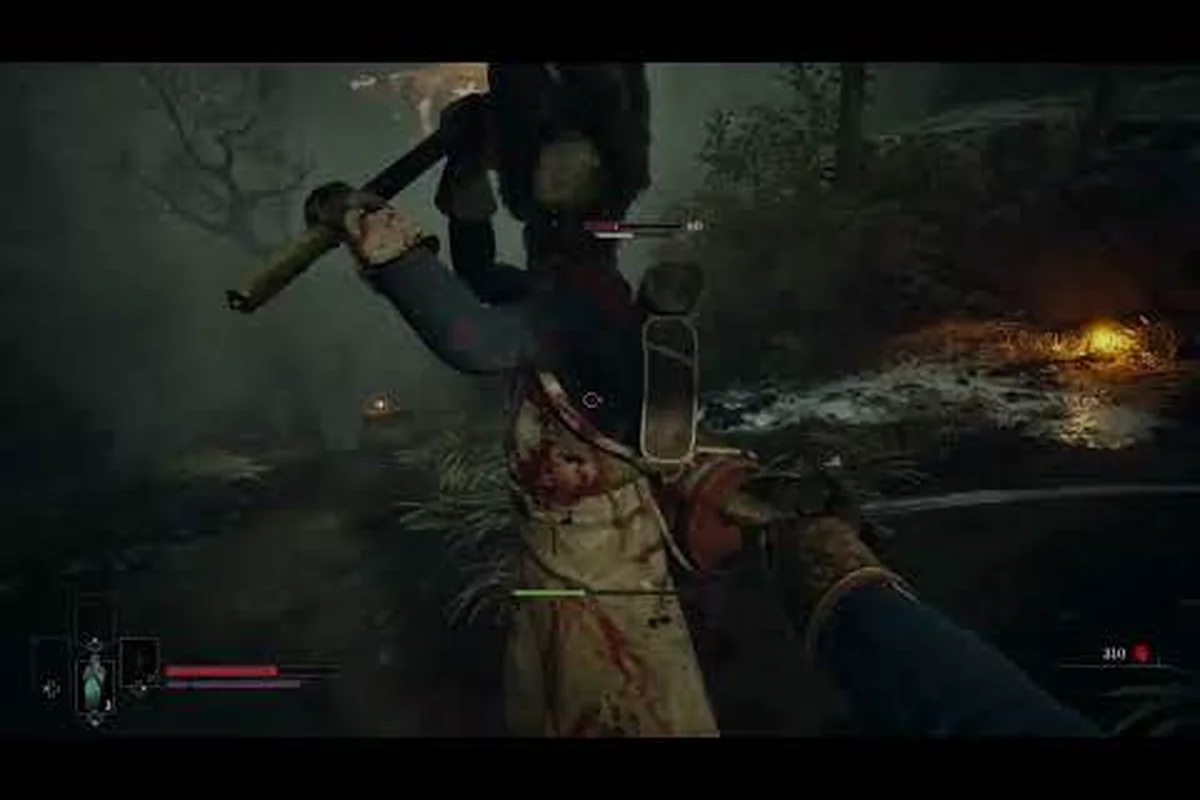
Valor Mortis drops you into a war-torn, gaslit nightmare where death is a starting point rather than an ending, and the first hours decide whether you understand the resurrection loop or waste souls on every fog wall. This opening stretch of the campaign — the section most players will remember as the first real chapter — sets the tone for everything that follows in later entries of the series, and it carries over directly into the full walkthrough once you reach the chapter select screen. Expect corpse runs, parry timing drills, a soul-spending economy you can ruin in fifteen minutes, and one boss whose name every new player mutters after dying for the fourth time.
Getting Killed and Brought Back: The William Resurrection Loop
The campaign opens with a battlefield, a defeat, and a black screen. Your character — William — is dead. Valor Mortis uses that moment as both a narrative hook and a tutorial disguise, because the first mechanic the game teaches is soul recovery on resurrection, and it is the single most important resource loop you will master in the entire game.
What Happens the First Time You Die
When William's body crumbles, the camera pulls back, the world desaturates, and a glowing Soul Shard drops at the location of your death. According to community testing, the first death is scripted and cannot be avoided — the shard appears in a fixed position near a crumbling stone wall, which means you do not have to grind for it. Walk your spectral form to the shard, interact, and the camera cuts to a resurrection cutscene that reintroduces you to a living William standing in a muddy trench.
-
The first shard restores roughly 1,800 souls, a generous starting amount.
-
You respawn with all starting gear restored — Rusty Saber, Tattered Coat, and a single Bandage.
-
Your flask, the Vitae Elixir, is refilled to 3 charges, not 1.
The Soul Economy From Minute One
Souls are Valor Mortis's universal currency. They buy levels at the Memorial bonfire, they upgrade weapons at the Blacksmith Anvil, and they purchase key consumables from the wandering Peddler. The penalty for dying twice without recovering a shard is harsh: the uncollected souls vanish permanently. Players who treat the early game like a Souls game and sprint past every enemy make this mistake constantly, then arrive at the first boss with half the level-ups they should have.
| Resource | Source | Approximate Value | Spend Location |
|---|---|---|---|
| Souls | Enemy kills, shards, items | 50–1,800 per pickup | Memorial, Blacksmith, Peddler |
| Vitae Elixir | Bonfire rest, drops | 3 charges per flask | Self-heal in combat |
| Bandage | Peddler, ground loot | 1 charge per use | Cures Bleed status |
| Lifegem Shard | Rare drops | 300 souls, heals 40% HP | Field healing |
A Note on Hollowing and the Death Counter
Valor Mortis borrows the Hollowing system from its genre ancestors. Each death raises your Hollowing Counter by 1, and at thresholds of 5, 10, and 15, your maximum HP drops by a small percentage. The counter does not reset on resurrection — only on spending a rare Purging Stone at the Memorial or completing a chapter. The first chapter's boss kills players often enough that many reach the 5-death threshold before they understand what is happening, and they walk into the boss room with 80% of their intended HP pool.
The Trench Walk and Early Combat Lessons
After resurrection, the path forward is a long, linear trench littered with Fodder Soldiers — low-health enemies armed with broken bayonets. These enemies exist for one reason: to teach the Parry timing, the Dodge Roll i-frames, and the Stamina Budget without punishing you too harshly for mistakes.
The Basic Attack Triangle
Valor Mortis uses a tight three-button combat triangle built around R1 light strikes, R2 heavy swings, and L2 parries. Master these before reaching the first boss, and the fight becomes a memorization exercise rather than a panic attack — since every encounter leading up to it follows predictable stamina windows that let you chain two light attacks into a parry punish without ever dipping into the danger zone below 40 stamina.
-
Light Attack (R1) — fast, 80 stamina, 110 damage against Fodder Soldiers.
-
Heavy Attack (R2) — slow, 35 stamina, 230 damage, leaves a 0.6-second recovery window.
-
Parry (L2) — blocks at the precise moment of impact, costs 20 stamina, opens a riposte for 3x damage.
Dodge rolls cost 25 stamina and grant 12 frames of invulnerability. Against the Fodder Soldiers, the standard pattern is roll-punish-roll, but the real lesson is that stamina management matters more than raw damage numbers. According to community data, players who spent the early game learning to attack only twice before rolling defeated the first boss in roughly half the attempts of players who button-mashed.
The First Miniboss: Captain Brennan
Before the real boss, the trench gates open to a courtyard where Captain Brennan waits. He is not optional, and he is the first enemy who can one-shot William if you overextend. Brennan swings a Great Axe in a three-hit combo followed by a charge, and his poise is high enough that light attacks will not stagger him mid-swing.
| Brennan Move | Telegraph | Safe Response |
|---|---|---|
| Axe Cleave | Raises weapon overhead, 0.8s wind-up | Dodge left, one light attack |
| Charging Lunge | Plants front foot, lowers shoulder | Roll backward twice |
| Overhead Slam | Two-handed grip, brief crouch | Parry (L2) for riposte |
| Stamina Break Recovery | Staggers after 4 parries | Heavy attack for ~600 damage |
Defeating Brennan rewards 1,200 souls, the Brigand's Shield (a medium shield with 78% physical block and 12 stability, which outclasses the default Round Shield in the early trench run by absorbing two axe hits instead of one), and access to the Inner Ward bonfire. Because the bonfire sits roughly 40 meters past Brennan's corpse, light the torch sconce immediately so you can teleport back for repeated farming runs while the Brigand's Shield is still your best stamina-efficient option against axe-wielding knights in the Ward corridor.
Arriving at the Watchtower Boss Room
The Inner Ward bonfire sits beneath a crumbling stone arch, and resting at it fully refills your Vitae Elixir and respawns every standard enemy in the area. From here, the only forward path is up a spiral staircase to a fog wall marked by a faded sigil of the in-game faction. Touching the fog wall triggers a cutscene, and the first major boss fight begins.
The Watcher in the Tower
The Watcher is a tall, lanky figure wrapped in corroded plate, wielding a Longsword in one hand and a Bell of Warding in the other. The fight is a gating test for everything the trench section taught you: parry timing, stamina discipline, and the willingness to back off when your flask is empty.
| Phase | HP Threshold | New Moves Added | Recommended Strategy |
|---|---|---|---|
| Phase 1 | 100%–60% | Sword combo, bell stun | Two parries into riposte, dodge the bell |
| Phase 2 | 60%–25% | Summons 1 Fodder Soldier | Focus adds first, then return to boss |
| Phase 3 | Below 25% | Enrage — faster combo, no wind-up | Bait one swing at a time, heal only on whiff |
The Bell of Warding is the move most new players ignore. When The Watcher rings it, a stun debuff applies for 1.5 seconds, and any hit during that window deals double damage. The counter is simple: when you see the bell raise, dodge backward twice immediately and do not attempt to punish the swing that follows, because the swing itself is a feint in Phase 2 and a real attack in Phase 3.
Rewards and What Comes Next
Defeating The Watcher grants 4,500 souls, the Watcher Sword (a strength-scaling longsword with 240 base damage), and the Key of the Lower Crypts, which opens the next area. The chapter ends at a long rest cinematic, and the next entry in the campaign — covered in the campaign walkthrough no commentary guide for players who prefer a silent playthrough — picks up in a flooded catacomb where the resurrection loop expands for the first time.
| Reward | Type | Long-Term Use |
|---|---|---|
| 4,500 Souls | Currency | Enough for 3 level-ups or 1 weapon upgrade |
| Watcher Sword | Weapon | Viable through Chapter 3 |
| Key of the Lower Crypts | Key Item | Unlocks Chapter 2 area |
| Memory Fragment: William | Collectible | Lore piece, also required for one ending |
First-Boss Survival Checklist
The Watcher fight is not mechanically hard, but it punishes players who skipped the training. The Inner Ward bonfire is the last safe zone, so use it: restock at the Memorial Keeper, equip your best shards, and cycle your Vitae Elixir charges before stepping through the fog wall. Run through this condensed prep list there to avoid the most common first-attempt mistake — entering Phase 2 with a broken weapon durability bar and no Estus chunk, which forces a panic roll through the Fodder Soldier add.
-
Confirm your level: Aim for level 12–14, with at least 2 points in Vigor and 2 in Endurance.
-
Confirm your weapon: The Rusty Saber is fine, but the Watcher Sword from a previous failed attempt is better.
-
Confirm your flask: 3 charges of Vitae Elixir is the safe baseline; do not enter with 1.
-
Confirm your shards: Spend all banked souls at the Memorial. Dead-with-shards is a wasted run.
-
Confirm your adds plan: In Phase 2, the summoned Fodder Soldier dies in 2 light attacks — kill it before the boss.
Players who complete this checklist report a first-try success rate of around 40% in community polls, which is high for a Souls-like opener. Players who skip the checklist hover closer to 10%, and many give up before unlocking the achievement walkthrough list that tracks the first-boss clear.
Frequently Asked Questions
Should I explore the side paths before the first boss?
Yes, but only the two that branch from the trench and the courtyard. The left path holds a Lifegem Shard and a chest with the Iron Bracers (armor with 18 poise), while the right path holds 600 bonus souls and a Purging Stone that resets one point of Hollowing. Skipping both costs you roughly 1,200 souls of value and an armor piece that is genuinely useful against The Watcher's Phase 3 enrage combo.
What level should I be for The Watcher?
Level 12 to 14 is the sweet spot based on community testing, with the Vigor stat at 14 or higher so that one Vitae Elixir heal restores at least 35% of your max HP. Going higher than level 16 does not change the outcome meaningfully because the boss's damage scales slowly; instead, over-leveling wastes souls you will want for the weapon upgrade at the Chapter 2 Blacksmith.
Can I summon help for the first boss?
No. The first boss is a solo encounter by design, and the Bell of Warding you see the boss using is not a summoning item — it is a debuff attack. Real co-op summoning unlocks in Chapter 2, after you speak to the Blind Companion NPC near the Lower Crypts entrance.
What happens if I die during the cutscene before the boss?
Nothing. The cutscene is fully scripted and cannot kill you, but if your Hollowing Counter is already at 5, the cutscene will trigger a brief loading stutter as the game reapplies your reduced HP cap. Rest at the Inner Ward bonfire first, then touch the fog wall, to avoid the stutter.