
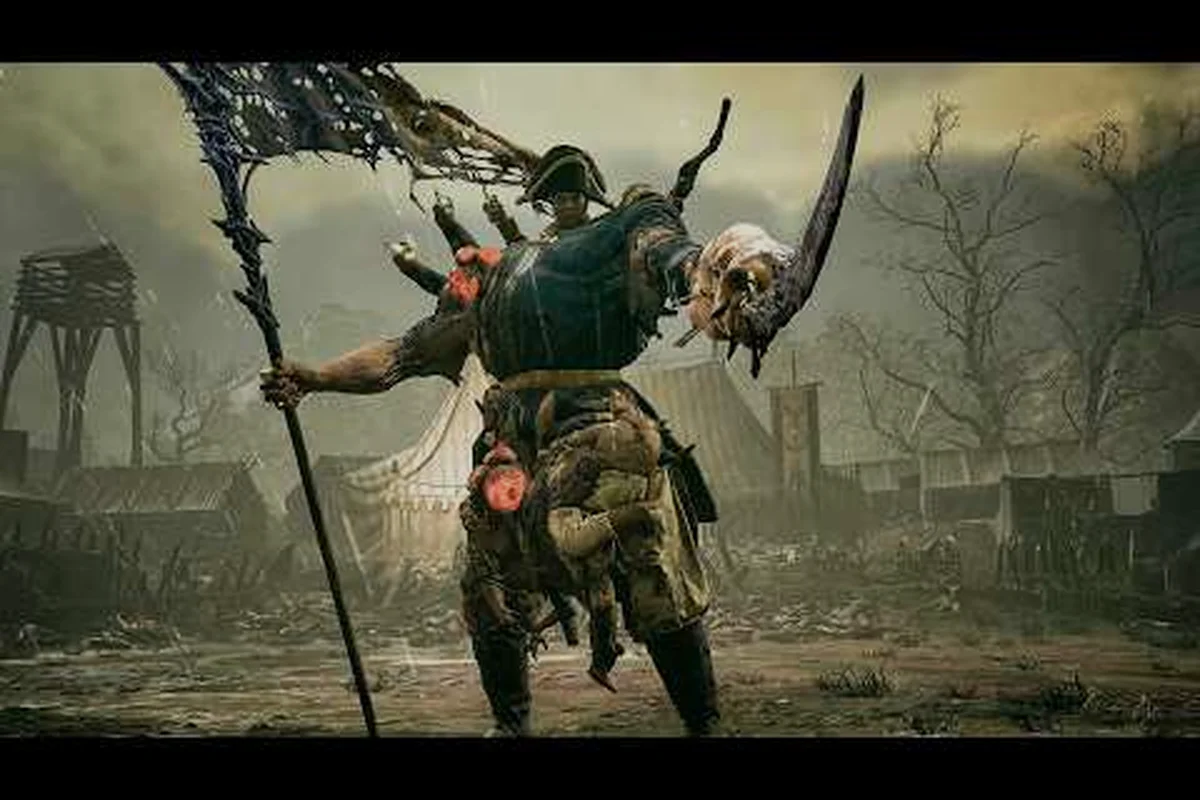
Understanding the Valor Mortis boss weapons drop system changes how you approach every major encounter because it determines whether a run rewards you with a new cutlass variant, a flintlock upgrade, or just a pile of crafting scrap. Bosses in this alternate 19th-century Europe do not hand out guaranteed gear, which means learning the drop tables, phase triggers, and enrage windows directly feeds your loadout progression. This guide breaks down the attack patterns, second-phase shifts, and summoning requirements so you can stop guessing and start farming with purpose.
How Boss Weapon Drops Actually Work
The Valor Mortis boss weapons drop mechanic operates on a weighted table rather than a fixed script, which explains why two players can defeat the same enemy and walk away with completely different rewards. According to the official Steam page, William's loadout centers on the cutlass as the main melee weapon and a flintlock pistol as the scarce ranged tool, but boss-specific variants only enter your inventory through these weighted rolls. Community testing suggests each boss pulls from a pool of three to five possible rewards, with the signature weapon typically sitting at a 15% to 25% drop rate on a standard kill.
The drop calculation appears to happen the moment the boss health bar hits zero, not when you open a chest or interact with a corpse. This means reloading a save after the kill animation does not reroll your reward, which frustrates players who expect save-scumming to work. Instead, the game locks the roll into your session seed, so you need to either accept the result or trigger a full area reset by dying or returning to a checkpoint. The first kill bonus on each boss guarantees one unique item, but repeat kills fall back to the standard weighted table with no pity mechanic confirmed as of the current patch.
| Boss Name | Signature Weapon | Estimated Drop Rate | First Kill Guarantee | Repeat Kill Pool |
|---|---|---|---|---|
| Grave Warden | Warden's Rusted Cutlass | 20% | Yes | 4 items |
| Iron Choir | Choir Bell Flintlock | 15% | Yes | 5 items |
| Napoleon's Vanguard | Vanguard Saber | 25% | Yes | 3 items |
| Flesh Cathedral | Cathedral Cleaver | 18% | Yes | 4 items |
Players who want to optimize their farming route should note that repeat kills do not increase the drop chance for the signature weapon, so grinding the same boss ten times in a row offers no statistical advantage over killing it once per session. The community consensus points toward rotating through all available bosses rather than hyper-focusing on one, because the first kill bonus resets only when you enter a new game cycle or trigger a specific world state change. This design choice pushes you toward exploring the full Metroidvania-inspired map instead of camping a single arena.
Reading Boss Attack Patterns Before They Land
Mastering valor mortis boss attacks explained through observation is the single most reliable way to avoid damage and create openings for your own combos. Every boss in the game telegraphs its moves through a combination of audio cues, wind-up animations, and environmental tells, but the timing windows are tighter than what you might expect from other action RPGs. The flintlock pistol becomes invaluable here because its stagger effect can interrupt certain attack chains, giving you a brief window to reposition or land a heavy melee strike.
The Grave Warden, often the first major boss players encounter, uses a three-hit combo that starts with a slow overhead swing, follows with a horizontal sweep, and finishes with a delayed thrust. The tell for the overhead is a distinct metallic scrape sound about half a second before the blade comes down, while the thrust is preceded by the Warden planting its back foot. Learning to recognize these audio cues matters because the visual wind-ups are subtle, especially in the dimly lit crypt arenas where this fight takes place.
| Attack Name | Telegraph | Dodge Direction | Follow-Up Window |
|---|---|---|---|
| Overhead Smash | Metallic scrape + raised blade | Side step | 2 heavy hits |
| Sweeping Cleave | Shoulder drop + low growl | Back step | 1 heavy hit |
| Delayed Thrust | Back foot plant + exhale | Side step | 3 light hits |
| Grave Spike | Hand slam + ground ripple | Sprint away | Ranged shot |
The Iron Choir fight introduces ranged pressure that forces you to manage distance more carefully. This boss fires volleys of bone shards that track your position, but the projectiles slow down after traveling a short distance, creating a gap where you can close in safely. The choir's melee attack is a bell slam that creates a shockwave, and the tell is a high-pitched chime that plays exactly one second before impact. Players who rely too heavily on blocking will find their stamina drained quickly, so dodging remains the safer option for most of this encounter.
Phase Shifts and Enrage Triggers You Cannot Ignore
The valor mortis boss second phase transition is where most deaths happen because the attack patterns change dramatically while your muscle memory still expects the first-phase rhythm. Each boss crosses into its second phase at a specific health threshold, usually between 50% and 60%, and the transition is always marked by a brief invulnerability window followed by a new moveset. The Napoleon's Vanguard fight demonstrates this most clearly: its first phase is a straightforward sword duel, but the second phase adds a cavalry charge that covers the entire arena and requires a perfectly timed dodge to avoid.
Understanding valor mortis boss enrage mechanics is equally important because enrage is not the same as a phase shift. Enrage triggers when a boss remains in combat for too long without taking significant damage, punishing passive playstyles that rely on chip damage from range. The enrage indicator is a red aura that builds around the boss's weapon, and once active, the boss's attack speed increases by roughly 30% while its stagger resistance doubles. This timer varies by boss, but community testing suggests most enrage windows open between 90 and 120 seconds after combat begins.
| Boss | Phase 2 Threshold | Enrage Timer | Enrage Effect | Phase 2 Signature Move |
|---|---|---|---|---|
| Grave Warden | 55% HP | 100 seconds | +30% attack speed | Crypt Collapse |
| Iron Choir | 50% HP | 90 seconds | +25% projectile speed | Requiem Volley |
| Napoleon's Vanguard | 60% HP | 120 seconds | +40% charge speed | Cavalry Rush |
| Flesh Cathedral | 50% HP | 110 seconds | +35% slam radius | Organ Burst |
The Flesh Cathedral boss deserves special attention because its second phase completely changes the arena layout. After dropping below half health, the boss tears open the floor to reveal a lower level filled with acid pools that deal damage over time. This forces you to fight on a shrinking safe zone while the boss rains down organ projectiles from above. The phase transition itself takes about four seconds, during which the boss is invulnerable, so use that time to reposition rather than waste ammunition on a target that cannot take damage.
Summoning Bosses and Preparing Your Loadout
The valor mortis how to summon boss requirement varies significantly between encounters, and some bosses only appear after you complete specific side objectives or collect certain items. The Grave Warden is the most straightforward: you need to ring the three cursed bells scattered throughout the crypt area, then return to the central mausoleum where the boss emerges from the largest sarcophagus. Each bell is guarded by a mini-boss or environmental puzzle, so the summoning process itself functions as a gear check before the main fight.
The Iron Choir requires a more involved setup because you must first collect four choir pages hidden in the cathedral's upper galleries. These pages are not marked on the map, which means you need to explore thoroughly or consult a boss guide that maps out their locations. Once all four pages are placed on the central altar, the choir materializes and the fight begins immediately, so make sure your flintlock is loaded and your cutlass is repaired before placing the final page.
-
Grave Warden: Ring three cursed bells in the crypt, then approach the central sarcophagus
-
Iron Choir: Collect four choir pages from the cathedral galleries, then place them on the altar
-
Napoleon's Vanguard: Defeat the three patrol captains in the war camp, then blow the signal horn
-
Flesh Cathedral: Destroy the five flesh anchors in the cathedral basement, then pull the organ lever
Your loadout choice matters more than raw stats for most boss fights because weapon speed and stagger potential determine how many safe openings you can exploit. The cutlass offers a balanced moveset that works against every boss, but heavier melee options trade speed for stagger, which can be useful against bosses with long combo chains. The flintlock pistol's limited ammo means you should save shots for interrupting enrage wind-ups or hitting weak points during phase transitions rather than using it as a primary damage source.
Farming Routes and Drop Optimization
Efficient farming of the Valor Mortis boss weapons drop system requires understanding how boss respawns work in relation to checkpoint placement. Bosses do not respawn immediately after death; instead, you need to either rest at a checkpoint, die, or leave the area entirely before the boss reappears. The checkpoint before boss locations are deliberately placed close to each arena, which reduces runback time but also means you cannot simply reload a save to reroll drops without triggering a full respawn cycle.
The most efficient farming route according to community reports starts with the Grave Warden because its arena is closest to a checkpoint and the fight itself is the shortest of the four major encounters. From there, players typically move to the Iron Choir since the cathedral is connected to the crypt through a shortcut that opens after your first clear. This route lets you hit two bosses in roughly 15 to 20 minutes depending on your kill speed and loadout efficiency.
| Farming Route | Bosses Hit | Estimated Time | Best For | Notes |
|---|---|---|---|---|
| Crypt Loop | Grave Warden → Iron Choir | 15-20 min | Cutlass + flintlock drops | Shortest runback |
| War Camp Loop | Napoleon's Vanguard | 10-15 min | Saber drops | Requires patrol captain clears |
| Cathedral Loop | Flesh Cathedral → Iron Choir | 20-25 min | Cleaver + flintlock drops | Acid pools slow the run |
| Full Clear | All four bosses | 45-60 min | Everything | Best for first kill bonuses |
The Flesh Cathedral fight is the least efficient for repeat farming because the second-phase acid pools force you to play defensively, which extends the kill time and increases the chance of triggering the enrage timer. Players who want the Cathedral Cleaver should focus on getting the first kill bonus rather than grinding repeat kills, since the drop rate does not improve with additional attempts. The weapon guide covers how these boss weapons compare to standard loadout options once you actually secure the drops.
Frequently Asked Questions
What is the exact Valor Mortis boss weapons drop rate for the Vanguard Saber?
Community testing places the Vanguard Saber drop rate at approximately 25% on repeat kills, making it the most generous signature weapon in the current patch. The first kill guarantees the saber, but subsequent kills pull from a three-item pool where the saber competes with crafting materials and a generic cutlass variant.
How do I know when a boss is about to enter its second phase?
Every boss flashes a white aura and becomes briefly invulnerable at the phase transition threshold, which sits between 50% and 60% health depending on the specific encounter. The transition animation lasts three to five seconds, giving you time to reposition before the new moveset activates.
Can I interrupt a boss enrage once it starts?
No, the enrage state cannot be interrupted once the red aura appears, but you can prevent it from triggering by maintaining aggressive damage output throughout the fight. The enrage timer resets only when the boss takes a certain amount of damage, so passive playstyles are actively punished.
Does the flintlock pistol affect boss drop rates?
The flintlock pistol does not directly influence drop rates, but its stagger effect can create openings that speed up kills, which indirectly helps you complete more farming runs in the same time window. Faster kills also reduce the risk of triggering enrage timers on longer fights.
Why did I not get a weapon drop after killing a boss?
The Valor Mortis boss weapons drop system uses weighted random rolls, so a signature weapon is never guaranteed on repeat kills. If you received crafting materials or a generic item instead, the roll simply landed on a different entry in the boss's drop table, and you need to trigger a full respawn before attempting again.