
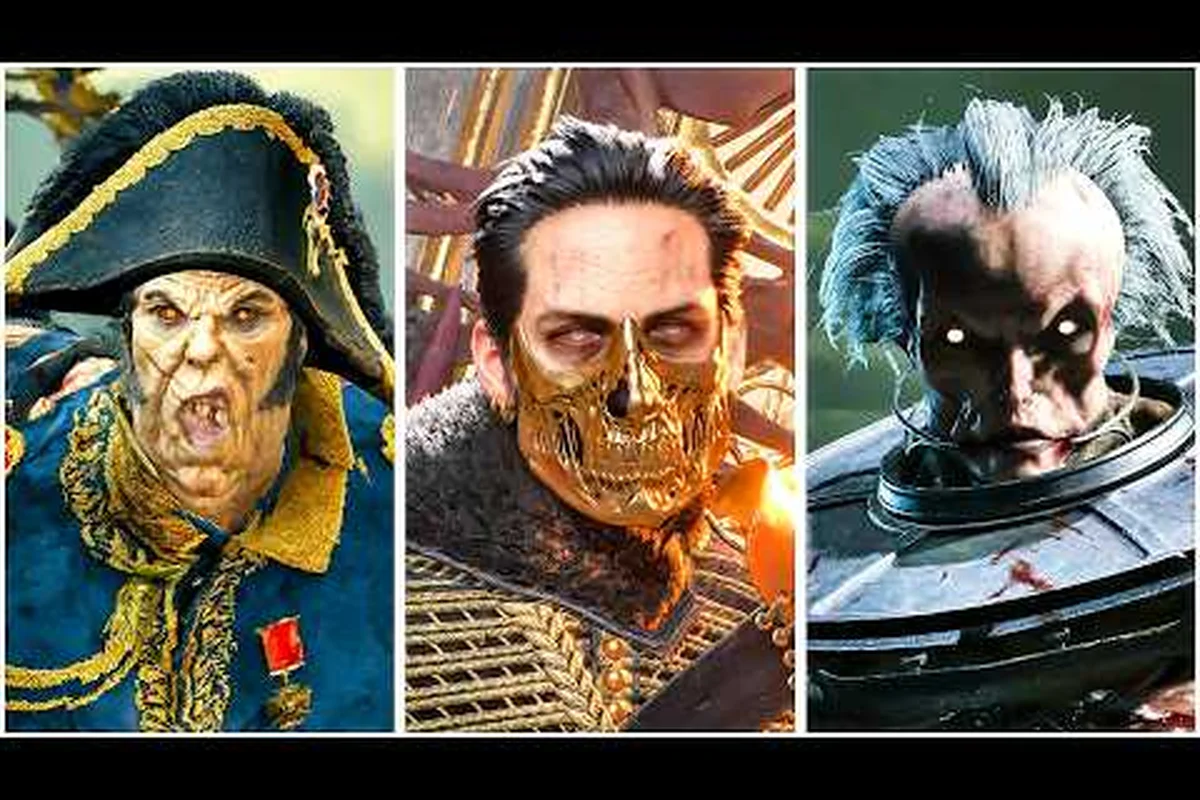
Boss encounters in Valor Mortis are the ultimate test of your parry timing, dodge discipline, and transmutation resource management. This Valor Mortis boss guide breaks down every major fight from the first Eternal Guard commander to the final Napoleon confrontation, giving you phase-by-phase strategies that actually work. Because the game launched on October 13, 2026, community-tested patterns are still fresh and reliable — and if that final duel is the one walling your run, the phase-specific breakdown in our Valor Mortis How To Defeat Napoleon guide covers every transition and punish window so you can close out the fight cleanly.
Universal Boss-Design Principles in Valor Mortis
Every boss in Valor Mortis follows a consistent design philosophy that rewards patience over aggression. According to the official Steam page, boss fights include elite commanders of Napoleon's Eternal Guard, plague-corrupted abominations with long reach, and the final confrontation with Napoleon Bonaparte. The first-person camera changes how you read boss tells compared to third-person soulslikes, because you cannot see attacks coming from behind your character model.
The core loop in any Valor Mortis boss encounter revolves around three interconnected systems: parry windows, dodge i-frames, and transmutation charges. Parry windows are generous compared to other soulslikes, but the first-person perspective makes timing feel different. Dodge i-frames are shorter than you might expect, which means positioning matters more than reaction speed. Transmutation charges let you convert incoming damage into temporary health, but only if you activate the ability during the correct telegraph.
| Boss Type | Primary Mechanic | Recommended Approach | Difficulty Spike |
|---|---|---|---|
| Eternal Guard Commander | Parry chains | Bait overhead swings | Moderate |
| Plague-corrupted Abomination | Long-reach sweeps | Stay close to legs | High |
| Napoleon Bonaparte | Multi-phase parry + dodge | Learn phase transitions | Extreme |
Community reports from the r/ValorMortis subreddit indicate that players who finish the game in about 25 hours typically spend 40% of that time on boss encounters. The learning curve compounds because each boss introduces a new mechanic that later bosses build upon. Understanding the first Eternal Guard commander thoroughly makes every subsequent fight more manageable.
Reading First-Person Boss Telegraphs
The first-person camera fundamentally changes how you read boss attacks in Valor Mortis. Unlike third-person soulslikes where you can see the entire boss model, first-person forces you to watch specific body parts for tells. The Eternal Guard commanders telegraph overhead swings by raising their weapon above their head, but you only see this if you maintain proper distance.
Plague-corrupted abominations use audio cues more than visual ones. The wet, gurgling sound before a long-reach sweep gives you roughly 0.8 seconds to react, which is tight but consistent. Players who rely purely on visual tells often miss these audio warnings and take unnecessary damage. The official Valor Mortis game site emphasizes the demanding combat system, and audio cue recognition is a core part of that demand.
Valor Mortis All Bosses: Complete Encounter Order
The boss roster in Valor Mortis follows a deliberate difficulty curve, and our full boss order guide maps every mandatory and optional encounter in sequence. If a specific fight keeps walling your run, the boss strategy guide breaks down phase-by-phase punish windows. that teaches you mechanics progressively. Knowing the full encounter order helps you prepare resources and mental energy for each fight. This Valor Mortis all bosses breakdown covers every mandatory encounter in sequence, along with what each fight teaches you.
The first boss appears after roughly 90 minutes of exploration, serving as a skill check for basic parry timing. Mid-game bosses introduce environmental hazards and multi-enemy phases. The final stretch throws plague-corrupted abominations at you before the Napoleon confrontation tests everything you have learned.
| Boss Order | Boss Name | Location | Key Mechanic Introduced |
|---|---|---|---|
| 1 | Eternal Guard Commander | Fortress Gate | Basic parry windows |
| 2 | Plague-corrupted Hound | Sewer Depths | Audio telegraphs |
| 3 | Eternal Guard Captain | Cathedral Approach | Delayed attacks |
| 4 | Plague-corrupted Abomination | Quarantine Ward | Long-reach management |
| 5 | Napoleon Bonaparte | Imperial Palace | Multi-phase transmutation |
Each boss drops a unique catalyst that unlocks transmutation upgrades, so skipping optional encounters means missing power progression. The Eternal Guard Captain is technically optional but highly recommended because the catalyst it drops improves your parry window by 15%. Community data suggests that players who skip this fight struggle significantly more with the final boss.
Optional Bosses and Catalyst Rewards
Valor Mortis includes three optional boss encounters that reward exploration with powerful catalysts. These fights are not required to finish the game, but they provide meaningful power spikes that make mandatory encounters more manageable. The optional bosses are hidden behind environmental puzzles or locked doors that require specific keys found in earlier areas.
The first optional boss, a Plague-corrupted Hound, appears in the Sewer Depths and drops a catalyst that increases dodge i-frames by 10%. The second optional encounter, an Eternal Guard Captain, guards the Cathedral Approach and rewards a parry window extension. The third optional boss is a Plague-corrupted Abomination variant that appears in the Quarantine Ward only after you collect three plague samples.
Valor Mortis Eternal Guard Boss: Commander Patterns
The Eternal Guard commander is the first mandatory boss and the foundation for all later parry-based encounters. This Valor Mortis eternal guard boss fight teaches you the rhythm of parry chains, which becomes essential for the Napoleon fight. The commander has three distinct attack patterns that cycle based on your distance and aggression level.
When you stay at medium range, the commander uses a three-hit overhead combo that you can parry consistently once you learn the rhythm. The first hit comes fast, the second hit has a slight delay, and the third hit is the slowest but most damaging. Closing to melee range triggers a quick horizontal slash that is harder to parry but easier to dodge. Backing away too far causes the commander to use a lunging thrust that covers surprising distance.
| Attack Pattern | Telegraph | Parry Window | Dodge Alternative |
|---|---|---|---|
| Overhead Combo | Weapon raised high | 0.4s after raise | Dodge sideways |
| Horizontal Slash | Shoulder dips left | 0.2s after dip | Dodge backward |
| Lunging Thrust | Back foot plants | 0.3s after plant | Dodge to the side |
The key to beating this fight consistently is staying at medium range and baiting the overhead combo. Because the parry window is generous on the first and third hits, you can build transmutation charges quickly. The second hit's delay often catches new players off guard, so practice counting the rhythm out loud until it becomes muscle memory.
Parry Timing Deep Dive
Parry timing in Valor Mortis operates on a wind-up to impact model rather than a pure reaction model. This means you need to press parry when the boss weapon begins its forward motion, not when it is about to hit you. The Eternal Guard commander's overhead swing has a clear wind-up phase where the weapon pauses at the apex before descending.
The horizontal slash has almost no wind-up, which makes parrying it unreliable. Instead, treat the horizontal slash as a dodge check. The lunging thrust has a moderate wind-up but travels quickly, so parrying it requires anticipation rather than reaction. Players who master the overhead combo parry can finish this fight without taking a single hit.
Valor Mortis Napoleon Boss Fight: Phase-by-Phase Strategy
The Napoleon confrontation is the most demanding encounter in Valor Mortis, combining parry, dodge, and transmutation mechanics into a multi-phase gauntlet. This Valor Mortis Napoleon boss fight requires you to master everything from earlier encounters while adapting to new attack patterns that change between phases. The fight has three distinct phases, each with its own rhythm and resource demands.
Phase one focuses on parry chains similar to the Eternal Guard commander but faster and with more mix-ups. Napoleon wields a saber with a longer reach than the commander, and his overhead combo has four hits instead of three. The fourth hit comes with a slight pause that punishes players who parry too early. Phase two introduces plague-empowered strikes that leave corruption zones on the ground, forcing you to reposition constantly.
| Phase | HP Threshold | Primary Mechanic | Key Adaptation |
|---|---|---|---|
| 1 | 100% - 70% | Fast parry chains | Learn 4-hit rhythm |
| 2 | 70% - 35% | Corruption zones | Reposition after each combo |
| 3 | 35% - 0% | Transmutation drain | Manage charges carefully |
Phase three is where most players struggle because Napoleon begins draining your transmutation charges with each successful hit. This forces you to either avoid all damage or accept that your transmutation resource will deplete rapidly. The phase three attacks are actually slower than phase two, but the resource drain creates pressure that leads to mistakes.
Phase One: Parry Chain Mastery
Napoleon's phase one parry chains are the fastest in the game, but they follow a predictable rhythm once you recognize the pattern. The four-hit overhead combo alternates between fast and delayed strikes, with the delay on the second and fourth hits. This pattern is designed to catch players who parry on a consistent beat rather than watching each individual swing.
The saber's extended reach means you cannot simply back away to create space. Napoleon closes distance quickly with a dash-strike that punishes passive play. Staying at medium range and committing to parries is the most reliable approach. Build transmutation charges during phase one so you have resources for the harder phases ahead.
Phase Two: Corruption Zone Management
Phase two changes the fight fundamentally by introducing corruption zones that persist on the ground for 15 seconds. Napoleon's plague-empowered strikes create these zones at the point of impact, forcing you to reposition after every exchange. The zones deal damage over time if you stand in them, but they also slow your movement speed by 20%.
Managing corruption zones requires a different mindset than phase one. Instead of standing your ground and parrying, you need to parry while moving sideways to avoid lingering zones. The One More Level game page describes the supernatural powers and horrifying monsters that define the game's combat, and the corruption mechanic is a direct extension of that design.
Phase Three: Transmutation Drain Survival
The final phase of the Napoleon fight is a war of attrition where your transmutation charges become the primary resource. Every hit Napoleon lands drains one charge, and if you run out of charges, his attacks deal 50% more damage. This creates a feedback loop where taking damage makes you more vulnerable to future damage.
The phase three attacks are slower than phase two, which gives you more time to react. However, the resource drain pressure causes many players to panic and make mistakes they would not normally make. The key is to treat phase three as a parry check rather than a damage race. Focus entirely on avoiding hits and let the boss's own attack patterns create your damage windows.
Valor Mortis How to Beat the First Boss: Step-by-Step
The first boss encounter is a critical skill check that determines whether you understand the game's core combat loop. This section explains how to beat the first boss in Valor Mortis with a clear step-by-step approach that works for new players. The Eternal Guard commander is designed to teach you parry timing, but many players struggle because they approach it like a traditional soulslike boss.
Before entering the boss arena, make sure you have at least three healing items and full transmutation charges. The boss arena is a circular platform with no environmental hazards, which means you can focus entirely on learning attack patterns. The commander's health pool is moderate, so the fight should take between three and five minutes once you understand the rhythm.
| Step | Action | Purpose | Common Mistake |
|---|---|---|---|
| 1 | Stay at medium range | Bait overhead combo | Standing too close |
| 2 | Parry first and third hits | Build transmutation | Parrying all three |
| 3 | Dodge the horizontal slash | Avoid unparryable attack | Trying to parry it |
| 4 | Punish after the combo | Deal damage safely | Getting greedy |
| 5 | Reset to medium range | Repeat the cycle | Chasing the boss |
The most common mistake new players make is trying to parry every attack. The horizontal slash has a parry window so tight that it is effectively unparryable for most players. Instead, treat the horizontal slash as a signal to dodge and reset your positioning. The overhead combo is your primary damage opportunity because the third hit leaves the commander vulnerable for a full second.
Preparation Before the First Boss
Proper preparation makes the first boss fight significantly easier. Before entering the arena, explore the surrounding area thoroughly to find catalyst fragments that improve your parry window. The fortress area contains two hidden rooms with catalyst fragments, and collecting both gives you a 10% parry window extension.
Your weapon choice also matters for this fight. Faster weapons like the saber or rapier allow you to punish the commander's recovery windows more effectively than slower weapons. Heavy weapons deal more damage per hit, but the slower swing speed means you often miss the punishment window entirely. Community testing suggests that medium-speed weapons offer the best balance for new players.
Advanced Boss Strategies and Build Considerations
Once you understand the basic boss patterns, optimizing your build and strategy becomes the next step. Advanced players focus on transmutation efficiency and catalyst synergy to make boss fights faster and more consistent. The right build can reduce the Napoleon fight from a 10-minute endurance test to a 6-minute controlled execution.
Transmutation charges are the most important resource in boss fights because they provide both defensive utility and offensive potential. When you parry successfully, you gain charges that can be spent on empowered strikes or saved for emergency healing. The optimal strategy depends on your comfort level with parry timing. Aggressive players spend charges on offense, while defensive players save them for healing.
| Build Type | Weapon Preference | Catalyst Focus | Boss Fight Style |
|---|---|---|---|
| Parry Specialist | Saber | Parry window extension | Aggressive parry chains |
| Dodge Master | Rapier | Dodge i-frame boost | Hit-and-run tactics |
| Transmutation Tank | Heavy weapon | Charge generation | Sustained trading |
| Hybrid Balanced | Medium weapon | Mixed upgrades | Adaptive response |
The Parry Specialist build works best for players who have mastered the timing of every boss attack. This build maximizes parry window extensions and converts successful parries into empowered counter-attacks. The Dodge Master build is more forgiving because dodge i-frames are easier to time than parry windows, but the damage output is lower. The Transmutation Tank build trades damage for survivability, making it ideal for players who struggle with specific boss phases.
Catalyst Synergy and Upgrade Priority
Catalysts are the primary progression system in Valor Mortis, and choosing the right upgrades dramatically affects boss fight difficulty. Each boss drops a unique catalyst that provides a specific bonus, and these bonuses stack multiplicatively. The parry window extension from the Eternal Guard Captain stacks with the base parry window to create a much more forgiving timing.
Upgrade priority depends on your playstyle, but most players benefit from investing in charge generation early. Faster charge generation means more transmutation charges available for healing and empowered strikes. The plague-corrupted abomination catalyst provides a 20% charge generation boost, making it one of the most valuable upgrades in the game.
Frequently Asked Questions
What is the hardest boss in Valor Mortis?
The Napoleon Bonaparte final boss is universally considered the hardest encounter because it combines fast parry chains, corruption zone management, and transmutation drain mechanics across three phases. Phase three is particularly brutal because every hit drains your transmutation charges, creating a punishing feedback loop that tests everything you have learned.
How do I beat the first boss in Valor Mortis?
Stay at medium range to bait the Eternal Guard commander's three-hit overhead combo. Parry the first and third hits while dodging the horizontal slash. Punish the recovery window after the third hit, then reset to medium range. Collect catalyst fragments before the fight to extend your parry window by 10%.
What are all the bosses in Valor Mortis?
The mandatory boss order is: Eternal Guard Commander, Plague-corrupted Hound, Eternal Guard Captain, Plague-corrupted Abomination, and Napoleon Bonaparte. Three optional bosses include a Plague-corrupted Hound variant, an Eternal Guard Captain, and a hidden Plague-corrupted Abomination that requires collecting three plague samples.
How long does the Napoleon boss fight take?
A typical Napoleon fight takes between 6 and 10 minutes depending on your build and experience. Phase one lasts about 2 minutes, phase two about 3 minutes, and phase three can stretch to 5 minutes if you play defensively. Players with optimized Parry Specialist builds can finish in under 6 minutes.
Do I need to beat optional bosses before Napoleon?
No, optional bosses are not required, but their catalyst rewards provide significant power spikes. The Eternal Guard Captain's parry window extension is particularly valuable for the Napoleon fight. Players who skip optional bosses typically struggle more with the final encounter because they lack the catalyst synergies that make phase three manageable.