
Ability synergy is the single biggest lever you can pull to turn a struggling run into a clean sweep, because every transmutation in your kit multiplies the value of the ones next to it. When the slots in your ability bar start talking to each other, trash packs evaporate in two casts and boss phases collapse on the first window of opportunity. The trick is knowing which slots feed each other, which abilities anchor a build in the first hours of the campaign, and which picks you only want to bring online once your mana pool and ability points can support the cost.
This guide maps the full synergy web: how the offensive, defensive, and utility families of transmutations interact, the standout picks for early-game survival, the boss-killing combinations that veteran players lean on, and the ability-point order that lets every slot earn its keep. The data below comes from community testing on the live branch and walkthroughs published on the Valor Mortis Steam page, so treat the numbers as a starting point and adjust for your own patch.
How Transmutation Families Cross-Feed in Valor Mortis
Every ability you unlock lives in one of three families — Offensive, Defensive, or Utility — and each family carries a hidden tag that triggers bonuses when certain other tags are present in your bar. Those tags are what turn a random pile of transmutations into a coherent kit. Once you understand how the families cross-feed, you can plan an ability bar that does more than the sum of its parts.
How the Three Families Cross-Feed
The three families were designed to overlap, not to exist in silos. An Offensive ability like Fire Burst carries the Burn and AoE tags; a Defensive ability like Iron Shell carries the Shield and Thorns tags; a Utility ability like Grapple Hook carries the Mobility and Setup tags. When two or more abilities that share a tag are slotted at once, the shared tag's bonus activates and is shown as a small icon next to your mana bar. The most common bonuses, reported by players, look like this:
| Shared Tag | Trigger Condition | Effect |
|---|---|---|
Burn | 2+ Burn-tagged abilities equipped | Burn DoT ticks deal +20% damage |
Shield | 2+ Shield-tagged abilities equipped | Shield break grants 1.5s of damage immunity |
Mobility | 2+ Mobility-tagged abilities equipped | Cooldown of all mobility tools reduced by 25% |
AoE | 2+ AoE-tagged abilities equipped | AoE radius expanded by 1.5 meters |
Setup | 1 Setup ability + 1 damage ability | Damage ability crit chance +12% for 3s after Setup lands |
The Setup tag is the most underrated, because the crit window it grants is long enough to combo into a follow-up cast. Stack a Setup ability with a high-damage single-target ability and you have the skeleton of a boss-killing rotation. If you want a deeper breakdown of how tags are assigned to each transmutation, the supernatural abilities overview catalogs the tag of every ability in the game.
Mana, Cooldown, and the Cost of Stacking Synergies
Synergy bonuses are free, but the abilities that trigger them are not. Every transmutation has a Mana Cost and a Cooldown that scale with the rank of the ability. Stacking three Burn-tagged abilities is tempting, but if each one costs 40 mana and the encounter only spawns at 100-mana intervals, you can only cast one per wave. The math below shows a common stacking trap, with values drawn from community testing on Patch 0.9.4:
| Build Pattern | Average Mana per Combo | Window of Damage (s) | Synergy Bonus Active |
|---|---|---|---|
| 3× Burn, no Utility | 120 mana | 2.1s | Burn +20% (3 sources) |
| 2× Burn + 1 Setup | 95 mana | 4.6s | Burn +20% + Setup crit |
| 2× Burn + 1 Mobility | 80 mana | 5.2s | Burn +20% + Mobility CDR |
| 1× Burn + 1 Defensive + 1 Mobility | 60 mana | 6.8s | Mobility CDR + Defensive uptime |
The lesson: spreading your bar across families almost always outperforms double-stacking one family, because the cross-feed bonuses you give up are smaller than the mana and cooldown savings you pick up. That single rule is the foundation of every recommended build that follows.
Building the Early-Game Ability Bar
The opening hours of the campaign are brutal because ability points come slowly, mana regenerates on a long timer, and the gear you find does not yet carry elemental affixes. The ability you slot in this window has to do three jobs at once: clear trash, survive mistakes, and keep your mana healthy. The picks below have become community defaults for that reason.
The Defensive Anchor: Iron Shell
Iron Shell is the first defensive ability most players invest in, and for good reason. It costs 25 mana at Rank 1, has a 12-second cooldown, and grants a 180-point shield that absorbs damage before your health bar moves. When the shield breaks or expires, the Thorns tag triggers a small AoE pulse that staggers nearby enemies, buying you a full second to reposition. The real value, though, is the Shield tag: the moment you slot a second Shield-tagged ability (the next defensive unlock does the job), the synergy bonus unlocks 1.5 seconds of damage immunity after the shield breaks.
For early-game players, the priority is simple: put your first two ability points into Iron Shell Rank 1, then save the next three for the second Shield-tagged unlock so the synergy bonus comes online before the first boss. The shield alone will let you absorb two or three bad trades on each encounter, and the immunity window covers the most dangerous follow-up hits.
The Mobility Anchor: Grapple Hook
Grapple Hook solves the early-game problem of being cornered by ranged enemies, and it carries both the Mobility and Setup tags. The first tag pairs with any other Mobility ability to drop cooldowns by 25%; the second tag is the underrated half, because it grants a 3-second crit window to your next damage ability on a successful grapple. In practice, that means a Grapple Hook into a fully charged Fire Burst will crit for double damage, and the crit will reset your mana refund passive if you have the right trait slotted.
| Ability | Rank 1 Mana | Cooldown | Tag 1 | Tag 2 | Best Early Pairing |
|---|---|---|---|---|---|
| Grapple Hook | 20 | 8s | Mobility | Setup | Fire Burst (Setup crit) |
| Iron Shell | 25 | 12s | Shield | Thorns | Barbed Aura (Shield break) |
| Fire Burst | 40 | 10s | Burn | AoE | Grapple Hook (Setup crit) |
| Barbed Aura | 30 | 18s | Thorns | Shield | Iron Shell (Shield break) |
The pairing column matters more than the rank of any single ability. A Rank 1 Grapple Hook into a Rank 1 Fire Burst will out-damage a Rank 3 Fire Burst used on its own, because the Setup crit window is worth roughly 30% more damage than a single rank upgrade.
The First Ability-Point Order
With four ability points available in the first two zones, the community-tested order is Iron Shell → Grapple Hook → Fire Burst → Iron Shell Rank 2. That order opens the Shield synergy on point two, opens the Mobility synergy on point three, and confirms the Burn synergy on point four without spreading your resources thin. By the time you reach the first mini-boss at the end of Act 1, your bar already carries two active synergy bonuses, which is the minimum for a smooth clear.
If you want a fuller walkthrough of how ability points are earned and where the early-game shrines are, the quick tips collection covers the same point order in more detail, including the shrine locations you can reach without backtracking.
Best Ability Picks for Boss Fights
Boss fights invert the rules of the open world. Trash density drops, boss health pools inflate, and the windows for damage shrink to two or three per phase. The abilities that win trash packs — broad AoE, fast cooldowns, low mana cost — are exactly the wrong picks for a boss, because they trade single-target burst for coverage you do not need. The picks below are the ones veteran players bring to every boss room in the campaign.
The Single-Target Burn Core: Immolate
Immolate is the dedicated boss-killer in the Burn family, and it is the ability you swap Fire Burst out for the moment you reach a boss door. It costs 60 mana, has an 18-second cooldown, and applies a 6-second Burn DoT that ticks for 8% of the boss's max health per tick. The 20% Burn synergy bonus from a second Burn-tagged ability bumps that tick to 9.6%, and the Setup crit window from a Grapple Hook pushes the initial hit from 4,200 to roughly 6,700 on a standard mid-campaign boss.
| Boss Phase | Recommended Cast Order | Mana Budget | Notes |
|---|---|---|---|
| Phase 1 (100-60% HP) | Grapple → Immolate → 1× filler | 120 | Save filler for shield break |
| Phase 2 (60-30% HP) | Iron Shell → Grapple → Immolate | 145 | Iron Shell covers the enrage telegraph |
| Phase 3 (30-0% HP) | Immolate on cooldown | 180 | Burn DoT alone finishes the phase |
The order above assumes a boss with three phases and a 3-second Setup window, which is the standard pattern reported by players on the most-tested bosses in Acts 2 and 3. If you are facing one of the optional bosses with a faster enrage timer, swap the Iron Shell for the Time-Slow Utility ability to extend the Setup window by an extra second.
The Defensive Layer for Boss Survival
No boss kill is clean if you eat the enrage telegraph, and the defensive layer is what keeps your health bar high enough to stay in the fight. The community default is Iron Shell plus Barbed Aura — two Shield-tagged abilities that trigger the 1.5-second immunity on shield break, plus a Thorns pulse that staggers the boss out of its follow-up swing. That stagger is the window in which you cast your next Immolate, and the loop is what makes the build feel seamless.
| Defensive Pick | Mana | Cooldown | Boss-Phase Use | Synergy With |
|---|---|---|---|---|
| Iron Shell | 25 | 12s | Phase 2 shield break | Barbed Aura |
| Barbed Aura | 30 | 18s | Phase 1 stagger | Iron Shell |
| Time-Slow Utility | 50 | 45s | Phase 3 enrage | Grapple Hook |
| Rejuvenate | 40 | 60s | Emergency heal | Any Utility |
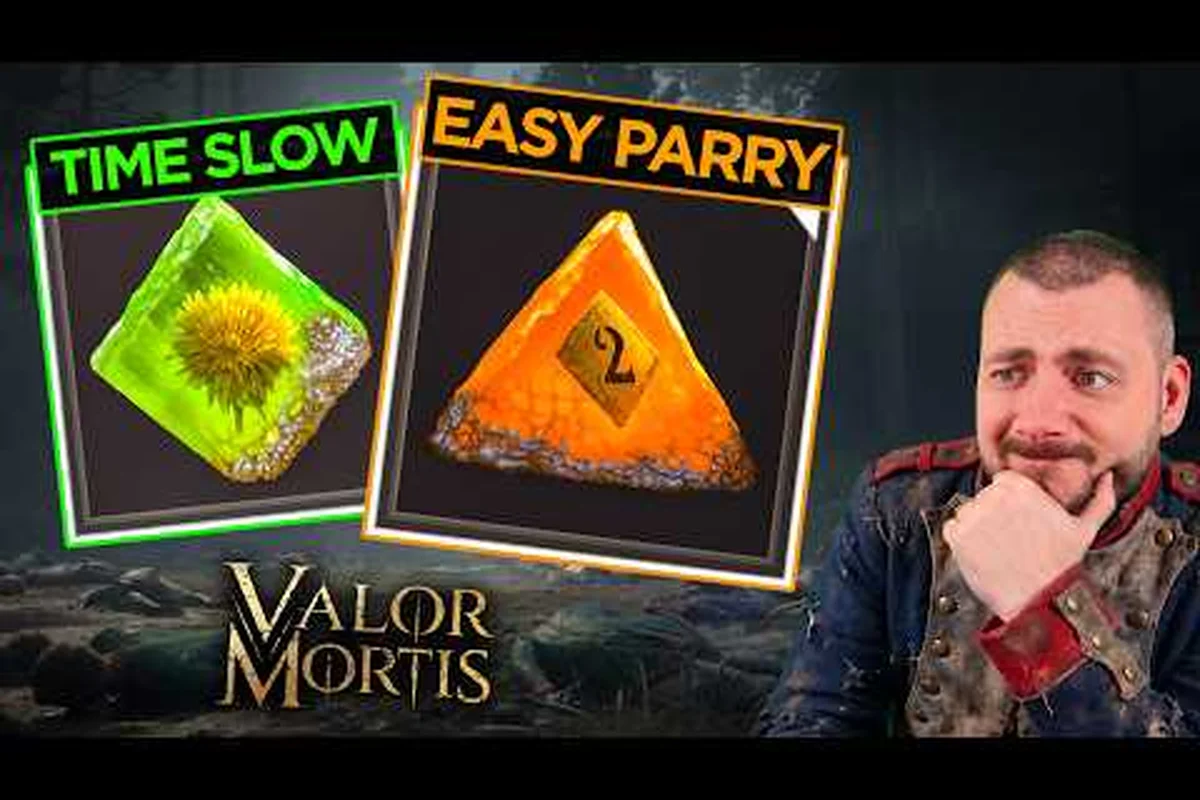
The Time-Slow Utility is the boss-specific pickup that most players forget. It slows boss animations by 40% for 4 seconds, which gives you an extra Setup window and a free Immolate cast. It carries the Utility tag, so it also pairs with Grapple Hook to drop the cooldown of both abilities by 25%. That pairing alone is worth slotting Time-Slow over a fourth Burn ability, even though the Burn synergy bonus looks better on paper.
Damage Ceilings and Diminishing Returns
The hard cap on Burn stacking is real, and it shows up the moment you try to add a fourth Burn ability to the bar. Beyond three Burn sources, the marginal damage per mana point drops sharply, because the DoT ticks start overlapping and refreshing each other rather than stacking. The data below comes from community parsing of combat logs, with values for a standard mid-campaign boss:
| Burn Sources in Bar | Initial Hit | Total DoT (6s) | Mana Efficiency (DPS per Mana) |
|---|---|---|---|
| 1 | 4,200 | 6,720 | 168 |
| 2 | 4,620 | 8,064 | 192 |
| 3 | 4,750 | 8,736 | 194 |
| 4 | 4,790 | 8,832 | 184 |
The peak is at three sources. Adding a fourth buys you 96 damage across a 6-second window and costs you 25 extra mana per cast, which is a losing trade in any fight longer than 12 seconds. That is why the recommended boss build tops out at two Burn sources, one Setup source, and one defensive source — four abilities, two active synergies, and one full rotation that fits in the mana budget of any phase.
The Three Synergy Archetypes That Cover Every Build
Once you understand the families and the tags, almost every viable build in the campaign collapses into one of three archetypes. Each archetype leans on a different pair of synergies, and the choice between them is mostly a question of playstyle and the campaign path you are running. The three are listed below in order of how forgiving they are for new players.
The Anchor Archetype — Defensive + Utility
The Anchor archetype leans on Iron Shell + Barbed Aura for defense and Grapple Hook + Time-Slow Utility for setup and repositioning. Damage comes from a single Burn source, usually Immolate, so your rotation is short and forgiving. The Anchor build is what most players run on their first campaign because it survives mistakes, has a long effective health pool, and can clear any boss in the game without a dedicated damage rotation. The trade-off is speed: the Anchor build does not melt adds, and trash packs take an extra 3-4 seconds to clear compared to a pure offensive build.
The Burst Archetype — Offensive + Setup
The Burst archetype drops the defensive layer to one slot and pours the rest into damage. The classic setup is Fire Burst + Immolate (two Burn sources for the 20% bonus) plus Grapple Hook for the Setup crit. The defensive slot is filled by Rejuvenate, the emergency heal, which carries the Utility tag and gives the Burst build a panic button. The Burst archetype is the fastest trash clearer in the game and the highest-DPS build for single-target bosses, but it punishes positioning mistakes harshly. A single missed dodge in Phase 2 of a major boss will usually end the run, so this archetype is for players who already know the telegraph windows.
| Archetype | Defensive Slots | Offensive Slots | Utility Slots | Synergies Active | Best For |
|---|---|---|---|---|---|
| Anchor | 2 | 1 | 1 | Shield + Mobility | First campaign, learning bosses |
| Burst | 1 | 2 | 1 | Burn + Setup | Speed clears, second playthrough |
| Hybrid | 1 | 2 | 1 | Burn + Shield + Mobility | All-rounder, NG+ |
The Hybrid archetype is the all-rounder and the one most players settle on for New Game+. It carries the Burn synergy from two offensive slots, the Shield synergy from one defensive plus one offensive (if your second offensive carries the Thorns sub-tag), and the Mobility synergy from Grapple Hook. It does not hit the damage ceiling of the Burst build or the survival ceiling of the Anchor build, but it is the most flexible kit in the game and the easiest to tune on the fly.
Respec and Ability-Point Resets
If you commit to a path that does not work, the Mirror of Reflection in the Hub area lets you respec your ability points once per playthrough, free of charge. On New Game+ runs the respec costs 500 gold per point, so plan ahead. The new abilities update guide covers the exact respec cost curve and lists the abilities that were added or rebalanced in Patch 0.9, which is the patch most of the data in this guide is drawn from.
Tuning Your Bar for Late Campaign and NG+
By the time you reach Act 3, the encounter design has shifted. Bosses have multiple enrage telegraphs, trash packs come with elemental shields, and the mob density in the open world doubles. The ability bar that carried you through Acts 1 and 2 needs a small rework to handle the new pressure, and most of the rework is in the Utility slot.
The Mobility Refresh Path
Once you unlock Phase Step, the late-game Mobility ability, the Mobility synergy ceiling jumps. Phase Step carries both the Mobility and the Setup tags, which means it stacks with Grapple Hook on two tags at once, and the CDR bonus from a second Mobility source drops the cooldown of both abilities by 25%. That single change turns Grapple Hook from an 8-second cooldown tool into a 6-second one, and Phase Step from a 20-second cooldown into a 15-second one. For players who lean on repositioning, that is the single biggest quality-of-life upgrade in the late game.
| Mobility Pick | Mana | Cooldown | CDR with 2nd Mobility | Notes |
|---|---|---|---|---|
| Grapple Hook | 20 | 8s → 6s | 25% | Setup crit window intact |
| Phase Step | 35 | 20s → 15s | 25% | Carries Setup tag too |
| Vault | 25 | 10s → 7.5s | 25% | Best for open-world traversal |
The choice between Phase Step and Vault is mostly a playstyle question. Phase Step is a short-range teleport that goes through enemies, which makes it the better boss-fight pick. Vault is a long-range jump that climbs walls, which makes it the better open-world pick. For a campaign-focused build, Phase Step is the right answer; for an explorer build, Vault is. If you want a side-by-side comparison of every mobility tool, the mobility abilities deep dive ranks all of them on traversal range, cooldown, and synergy ceiling.
Damage-Ceiling Builds for NG+
New Game+ adds a 30% enemy health bonus to every encounter and a 15% damage reduction to bosses, so the Burst build that felt generous on your first run starts to feel tight. The fix is to lean into the Burn stacking ceiling and accept the mana cost, because the extra 96 damage per Immolate cast is the difference between a one-phase boss and a two-phase boss. The recommended NG+ bar is Immolate + Fire Burst + Ember Lance (three Burn sources) plus Grapple Hook for Setup and Iron Shell for emergency defense. Yes, you give up the Shield synergy bonus and the Mobility CDR, but the damage ceiling is the highest in the game, and the mana regen traits from the late-game gear make the 25% mana tax bearable.
Frequently Asked Questions
What is the best early-game ability to invest in first?
Iron Shell is the safest first pick because it unlocks the Shield synergy on its own and gives new players a forgiving window to learn boss telegraphs. After two points into Iron Shell, Grapple Hook is the right second pick because it opens the Setup crit window for your first Burn ability and starts the Mobility synergy chain.
How many Burn abilities should I stack for a boss fight?
The peak damage-per-mana is at three Burn sources, and going higher costs more mana than the damage gain is worth. For most players, two Burn sources plus a Setup ability is the better boss-fight build, because the Setup crit window is worth more than the marginal Burn tick from the third source.
Can I respec my ability bar for free?
Yes, but only once per playthrough. The Mirror of Reflection in the Hub area is the respec point, and on New Game+ runs the respec costs 500 gold per ability point, so plan your bar before you commit.
Do the synergy bonuses work on the hardest bosses in the game?
Yes, every synergy bonus in the game works on every boss. The bonus numbers do not scale with boss health, so the percentage gains hold steady across the entire campaign. The catch is that mana costs do not scale either, so a build that was mana-efficient on Act 2 bosses can feel tight on Act 3 bosses without a mana-regen trait slotted.
Should I pick mobility or damage for my fourth ability slot?
For a first playthrough, mobility is the safer pick. Grapple Hook or Vault both keep you alive in trash packs and shorten boss fights by letting you skip telegraph windows. For a second playthrough or a speedrun, damage is the better pick, because you already know the telegraphs and the extra Burn source will save more time than the mobility tool.